Note: after measuring and cutting in step 6, you can come back and continue punching the designs to remove the edge piece.
|
ID: The Punching Tutorial
Created: August 8, 2010 I love punches especially Martha Stewart's & EK Success punches. Hopefully this will expand the uses of your border punches. The technique is quite easy to do and works with slight alterations for all the punches. |
|
|
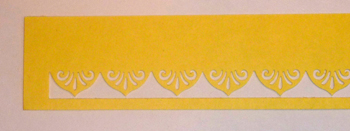
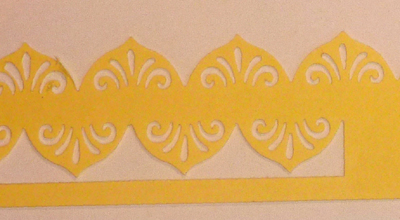
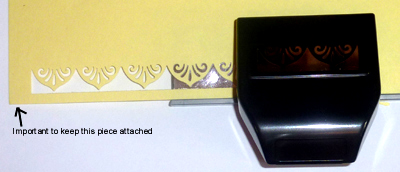
STEP 1: Punch your
row of designs, keeping a piece of the edge of your cardstock
intact - that's important. It's where you'll do the measuring.
Also make sure you match up your images on the punch as you go
along and keep the edge of your paper well butted against the
wall of the punch. Note: after measuring and cutting in step 6, you can come back and continue punching the designs to remove the edge piece. |
|
|
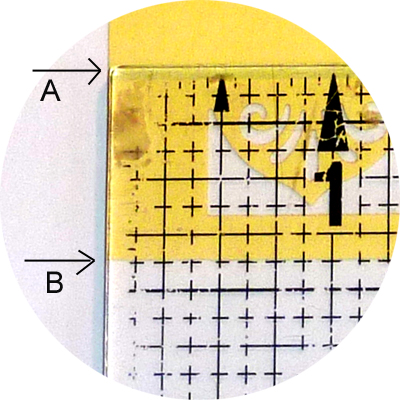
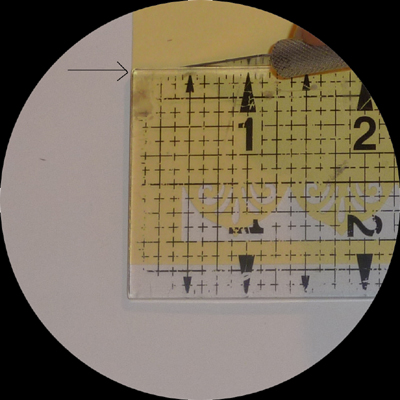
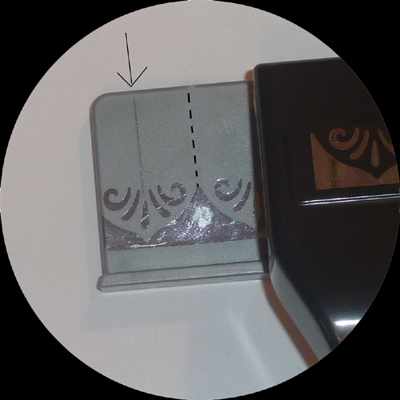
STEP 2: Place the edge of your ruler at the point where you want the opposite design to fall (A). For this particular design I want about 1/10" space between the designs. So you'll notice the dotted line on the ruler is about that distance from the highest cut element. PS: if you want to match holes, then make sure your "A" point of the ruler falls at the horizontal mid point of the hole. See EKS DE Punches for the Le Scallop Daisy, especially when doing one or 3 rows of daisies. Note in some cases the designs will overlap. I will mention this when it's viable. The portion between A & B is the depth or width you need to be able to butt up against the wall of the punch to do the opposite side of designs. |
|
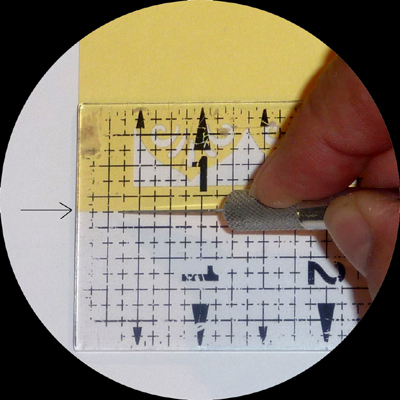
STEP 3: I place my knife tip on that (B) line from step 2 |
STEP 4: Keeping my knife tip on that (B) line from step 2, I move my ruler to the (A) spot |
|
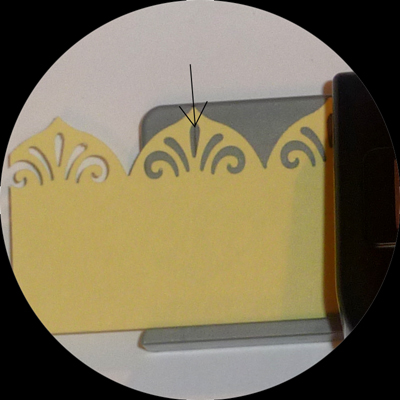
STEP 5: I now have the full width that I need to cut, and I nick my cardstock at that point where the arrow is. |
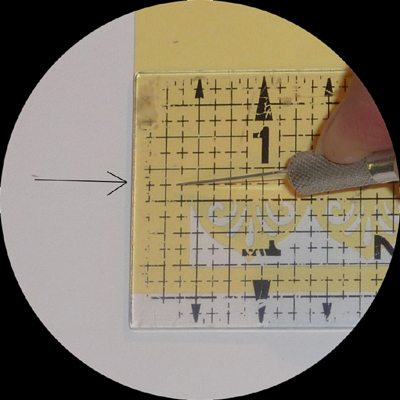
STEP 6: I line up my ruler at the nick and make sure one of the lines on my ruler go through at the same point along all the designs, and then I cut the excess cardstock away. |
|
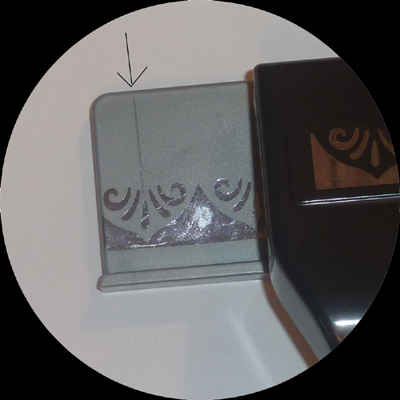
STEP 7: I pencil in a line that runs smack in the middle of one of the designs. |
 or you can put it in the middle of the two designs - either line will work nicely. For this tutorial I'm using the first option |
|
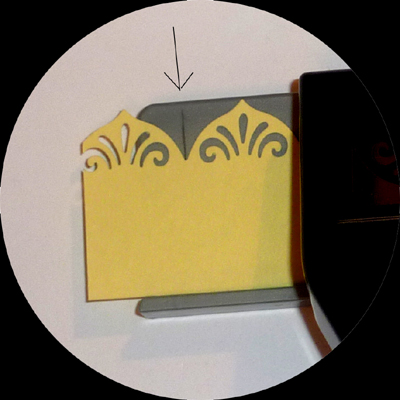
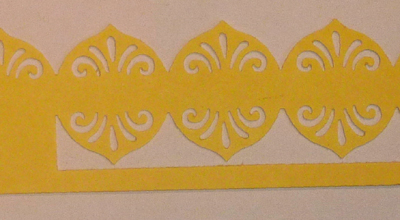
STEP 8: I flip my punched and cut border piece and place back into the punch, aligning with one of my drawn lines. In this case I'm using the arrow line and placing it between the design elements. |
This is the result you would get Now by leaving less or more space in Step 2, your design element rows would get closer or further apart, creating a tighter interaction between the designs or leaving room for ribbons or quotes or journaling. |
|
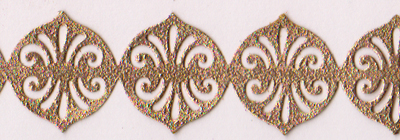
STEP 9: And in this case I'm using the arrow line and placing it At the peek of the design elements. You can see the pencil line just peeking through the opening. |
This is the result you would get |
|
|
Return to Punches Gallery or to NittyGritty Gallery
|
| Home |
Page
Index (text only) |
Glass Gallery |
"And
More" Gallery |