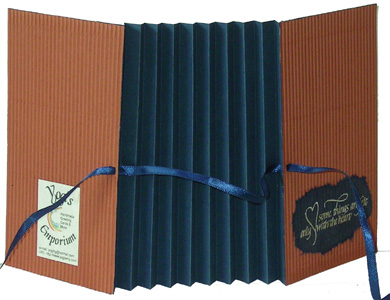
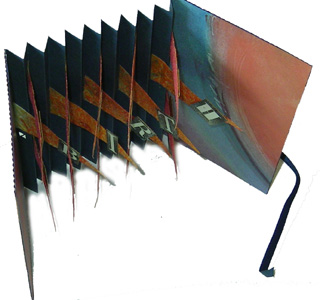
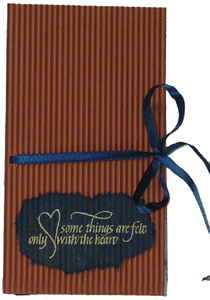
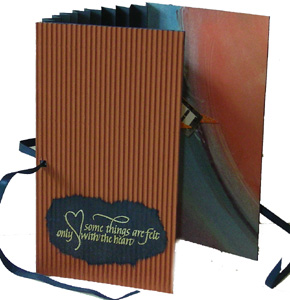
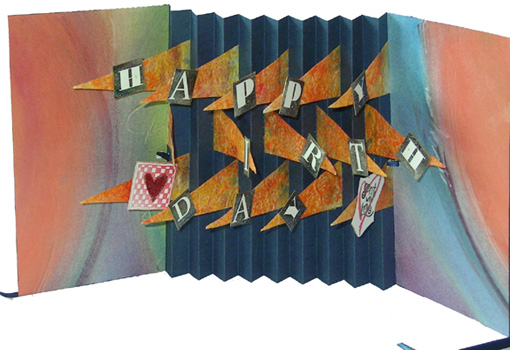
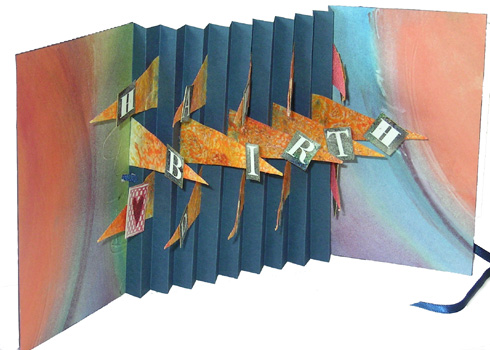
Closed view
Standing open |
ID: Portfolio Flag Card
Created: March 11, 2007 Double sided tape
(for accordion to cover)
|
Inside reading the flags "Happy" & "Day" with hearts on either side PS: try leaving the card flat on a table instead of standing up. Looks really neat, like a porcupine or spiny dragon. |
Inside reading the flags "Birth"
|
Spine
Top view |
INSTRUCTIONS:
Score and fold the dark blue cardstock accordion style. 1st score at 1" then 18 scores at 1/2" each which will leave a 1" piece at the end. If you're not using a "Score-it, then butt a thick flat edged ruler along the edge of your cardstock, place a small ball embossing tool at the 1/2" mark and slide a right angle triangle along the thick ruler till it butts up to the embossing tool. Run your scoring tool along the edge of the right angle triangle. I get perfect even scores that way. Make a template for your triangle flags. Approx 1.25" at the bottom flat edge and 3" long. Pencil in your mid point on one edge and cut from mid point to outer tip of bottom flat edge. Cut other side same way. You now have a triangle with two even sides. Cut 15 triangles from your decorated thick textured mulberry paper. Pencil in on your accordion from the top, at the 2" and 5" mark on the right side folds and at the 3.5" mark on the left side fold (so when you're gluing your flags they'll all line up). Glue to accordion on alternate folds (glue first flag on right side of fold, skip next right fold then glue onto next right fold and so on). Stamp your alphabet letters on the cream cardstock with Brilliance graphite black and emboss with "psychedelic", cut out. Stamp your hearts with the Brilliance rocket red and emboss with clear, add red glitter to the checkerboard heart. Color back of letters and hearts with the gold leafing pen leaving a small center square free of paint for better gluing. Adhere your alphabet squares and hearts to flags with Aleene's Tacky glue, positioning them at slight angles. Cut 2 pieces of your corrugated cardstock 7"h x 4"w. Using the double sided tape attach the 1" portions of your accordion to the backs of the corrugated cardstock. Cut your scrapbook paper about 1/8" larger than the corrugated covers so you can trim after attaching it to the covers for a neat finish. Glue and butt the edge of the scrapbook paper into the valley of the first fold. Run the tip of your dark blue marker along the edges of the card to cover the white of the paper. For front quote, use a static bag and stamp on side that is less fibrous. Ink your quote stamp with Pearlescent beige and emboss with the white gold. Use a small wet paint brush and run it along the outside area of the quote where you want to tear the paper and get a nice feathered edge. Glue down with a glue stick. Use your mini square punch to make a hole for your ribbon, punching through cover and right side of first fold. Thread your ribbon through the holes. Tie closed.
TEXTURED
MULBERRY PAPER:
|
Return to NittyGritty Gallery
Home | Page
Index (text only) |
Glass Gallery |
"And
More" Gallery |