ID: Glittered Xmas Ornaments
 

Created: September 27, 2010
Modified:

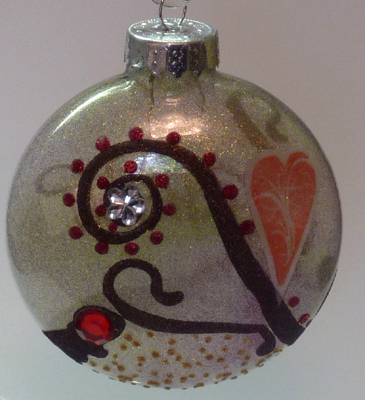
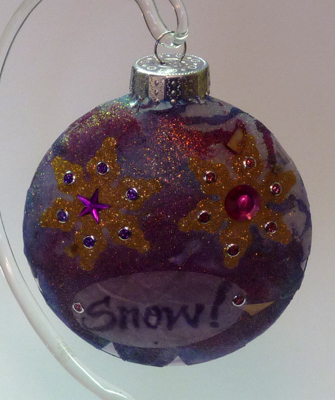
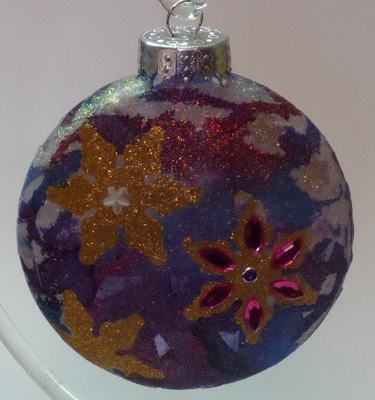
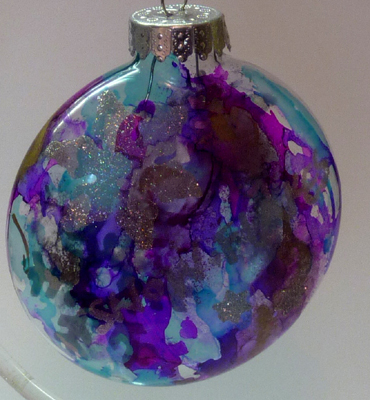
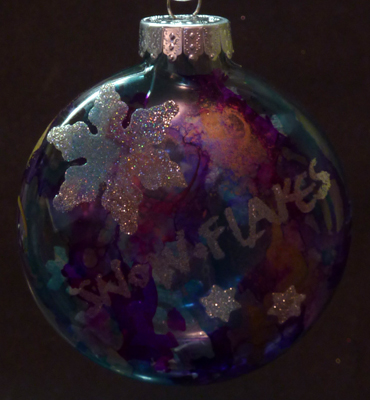
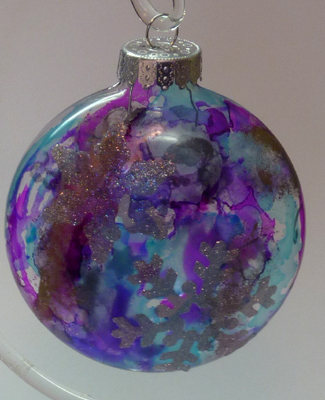
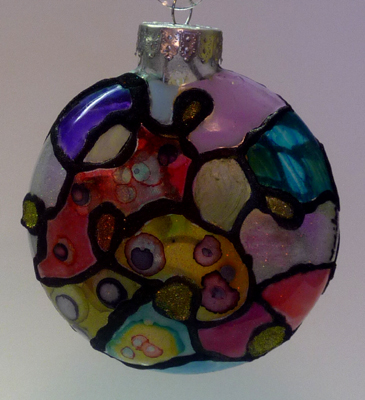
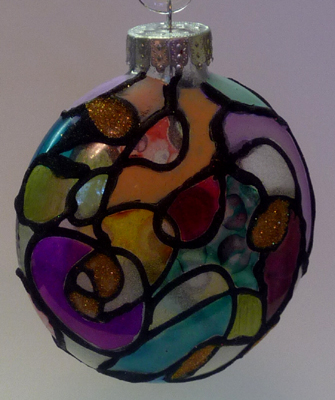
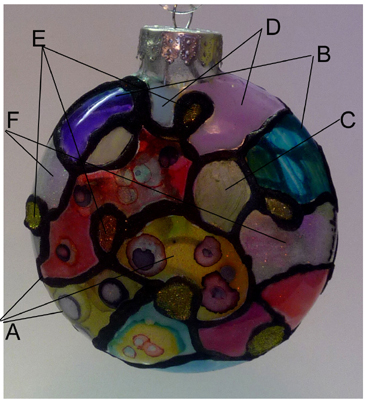
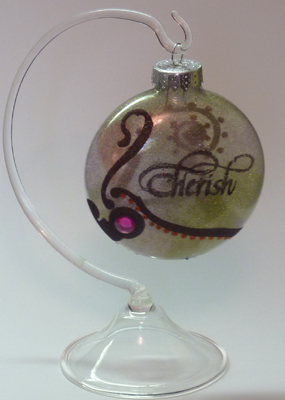
I purchased the clear flat type of Xmas Ornaments from a major crafting store, then went to town with the glitter.

There are 4 ornaments and for each ornament I'll mention the individual glitter colors I used.

Supplies:
Sookwang Tape 5" wide or sheet
Glitter Ritz Micro Fine glitter
Rubber Stamps: Quietfire Design "Life Journey Words", "Flourishing Inside Heart", "Textured Holiday Words",
Spellbinder's Die "Doodle Parts"; "Create a Flake 1"; "Fancy Tags"
Embossing/Die cutting machine "Cuttlebug", "Big Shot" or "Wizard"
Alcohol Inks (Raspberry, Pool, Gold Mixative, Blender)
Ecoline Inks (Ultramarine Violet, Turquoise Blue, Magenta)
Pipettes
Red & purple pigment ink pad
Clear Embossing powder
Heat Gun
Essentials Glue Pad
Jones Tones Plexi Glue
Krylon Easy Tack spray
Zig 2way Squeeze & Roll Glue pen or Sailor Glue Pen
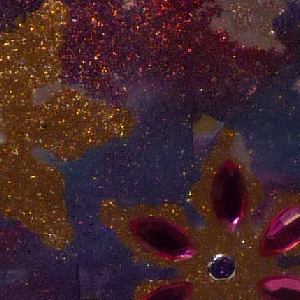
Various Rhinestone and pearl sticker gems
Starform Glitter Stickers round various colors
Hair Dryer (optional)
See last ornament for various pens used

Glitter: Bronze, Dark Gold, Orange, Regal Red, Chartreuse, Warm Highlights, Rose, White.

Spray the inside of the ornament with the Easy Tac, keeping the nozzle right at the opening, turning and spraying again until the inside has a nice coating. Note: you don't want a puddle of spray, but just a nice misting.

Drizzle one of the glitter colors inside (not too much), and shake to coat the sides, continue putting more glitter inside and shaking until you have a nice coating. I used Chartreuse, Rose, Warm Highlights.

If you are using the wide tape rather than a sheet, you'll need to put a piece of release paper on the other side of the tape (you know those release papers you stash away for just such an occasion).

Die cut a couple of the large very curly one and a couple from the one that looks like a small curved staff. Apply them to the glass ornament only removing a small piece of release paper, pressing it onto the ornament and then removing the rest of the release paper as you apply it to the glass. Note: if you take the release paper off all at one time, you'll probably end up with a holy mess.

Remove the top release paper and sprinkle with Bronze glitter.

Ink up your Cherish stamp with the Glue pad (re-ink the pad so it's nice and juicy), press down on the ornament and then lift. Note: do not put stamp on acrylic block it will be too difficult to follow the contour of your ornament. Sprinkle with the Bronze.

On a separate piece of glitter tape, sprinkle with white, burnish well and clean off any excess glitter using a damp soft cloth. Ink up your heart with red stamp pad ink and stamp onto glitter. Clear emboss. Cut around heart leaving a nice white border. Carefully remove the release from the tip of the heart and start applying to ornament, then continue removing release paper and pressing down.

Use the Glue pen and squeeze generous round dots along the flourish lines, sprinkle with glitter. One I did with the red, one with the orange and I did a bunch of small dots on the bottom of the ornament and sprinkled with gold.

I added a pink toned red, & clear floral rhinestone.


Glitter: Warm Highlights, Dark Gold, White

Cut pieces of tape in triangular and odd straight edged shapes and apply to ornament, removing release paper after each is applied and overlapping tape to create a patchwork effect. Leave some open spaces too. Do only one side at a time. Sprinkle with Warm Highlights, burnish well and wipe off excess. Continue with other side in same manner.

Use the 2 medium sized dies to die cut shapes from the snowflake set  using the tape sheet or tape with release paper on both sides. Apply to ornament, leaving the top release paper on.

Apply Ecoline inks, using the pipettes randomly, misting with a bit of water, dabbing with a paper towel to remove any drips. You'll see the inks run and merge and follow crease lines and open spaces. Dry thoroughly. You can speed the drying with a hair dryer.

Remove release paper from snowflakes and sprinkle with gold. Burnish well.

Stamp the word Snow on a piece of tape sprinkled with White, using a purple stamp pad and clear embossing. I cut it with the oval shape from the Fancy Tags die set.

Apply to ornament and add some red Glitter dots. Add glitter dots to star points and various rhinestones.


Glitter: Cool Highlights, Stardust

I dispensed the alcohol inks straight from the bottle to the outside of the ornament - a very little at a time and rotated the ornament to move it where I wanted it.

Die cut some snowflake shapes using the 2 medium sized dies from the tape sheet or tape with release paper on both sides. Apply to ornament, Remove top release paper and sprinkle some with Cool Highlights & others with Stardust. Note: one is more transparent than the other.

Mask your Snowflake word stamp, inking only the word Snowflake with the Glue pad, press down on the ornament and then lift. Note: Make sure ink pad is juicy and do not put stamp on acrylic block it will be too difficult to follow the contour of your ornament. Sprinkle with the Stardust.


Same view as image above but done on black background to see better contrast of word and snowflake

Glitter: Black, Warm Highlights, Dark Gold, Chartreuse

I dribbled the Plexi glue in a random loop design. Sprinkled Black Glitter all over, shook most of it off and allowed the glue to dry overnight, then brushed the balance of glitter away. Repeated with other side.

Then had fun using all kinds of coloring agents to fill in the spaces. I wanted something more opaque on top to hide the prongs so I used Sakura Soufflé pens. The purple on the upper left and marine blue on the right are Bic Alcohol markers (I tried Copic markers and they didn't work very well - no color).  All those splotchy sections are alcohol inks dribbled into each other. I also painted some plain alcohol ink sections around the bottom. Small loops have various colored glitter. I had a couple spaces open and thought I'd try Lumieres. They work, but need a couple coats to even out the streaks. I used Sakura Glaze pens that worked really nice. The Sakura Metallic pens did not work - they never dried, so removed them.

When all done, the glass was too transparent so I sprayed some glue to the inside and sprinkled with Warm Highlights.

A - Alcohol inks
B - Bic Alcohol Markers
C - Lumiere Paints (Citrine)
D - Sakura Soufflé pens
E - Glitter
F - Warm Highlights on inside through clear glass


Return to More Glitter Gallery or  to  NittyGritty  Gallery


Home Page Index
(text only)
Glass
Gallery
"And More"
Gallery