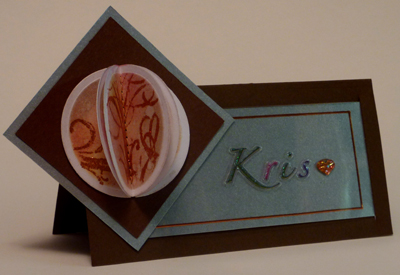
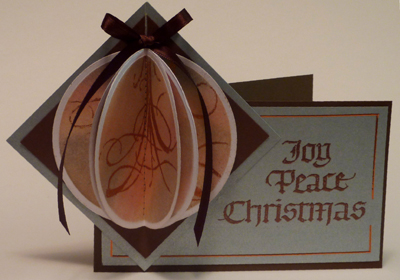
Is there anything more sophisticated than having your name on a name plate at a dinner table? Well here's the perfect gift for someone. Make the card and several name plates (as the gift) to match the dinner service or maybe to go with the holiday season. I've used a Nestabilities circle die to create a globe ornament, but you can use the Nestabilities Heirloom Ornaments seen HERE, or the Nested Apples or Pears for an autumn theme or Hearts for Valentines Day. I'm sure if you look at the shapes available you could come up with a lot of them that can be done in a 3D style to match any occasion. Go to town... 
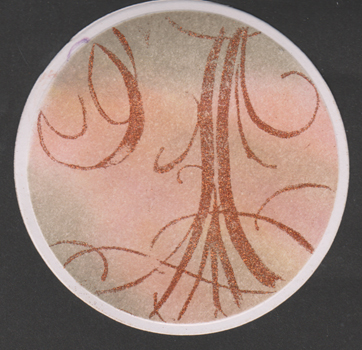
The coloring on the ornaments was a take on a gorgeous sky I recently saw, streaks of grey, peach and lavender. |
ID: Card & Name Plate - 3D Globe Ornament
Created: October 9, 2010
Supplies: |
The side folded card was spliced at the fold with approximately a 1/4 overlap to make a 5.5"w x 3.25"h card. Cut a 3.5" square silver piece, a 3.2" square brown piece, and a 5.25"w x 3"h silver piece. Die cut 3 white circles 6th size up for card and 3 from the 3rd size up for name plate. Dry emboss and using the die as a stencil sponge Distress on both sides. Mimic the streaks of a sky. Mist with water and dry with hair dryer. Ink the large flourish stamp with a juicy glue pad, and keeping the circle die in place, stamp your design, remove die, sprinkle with glitter, put excess glitter that falls off naturally into container, press glitter on flourish down with the release paper, dry with heat tool, when cool, lightly brush off any excess glitter. Note the glitter is not scratch resistant so care must be taken. It can be protected with a coat of Krylon Clear Finish. Carefully score the circle in half (you can jump over the flourished areas if you want) and fold. Repeat on other 2 circles. Take to sewing machine with brown square. Open one circle flat and center on brown cardstock, then sew done middle starting at the colored area and ending at the colored area. Pull front thread to back and tie knots, trim. Butt the next circle to one side of the center circle and sew down center fold line. Your lines should be almost touching each other on the back, that's how close you want them to be. Pull thread to back and tie. Repeat with last circle butting up to other side of center circle. Adhere this element to the silver square. |
Cut the textured word set apart and place desired words on acrylic block, dust silver cardstock with anti static bag, ink with pigment ink and stamp as shown on card. Emboss with copper. Place copper border lines pleasingly around edge jumping over words if necessary (I always have spaces for words to jump out, gives a freer feeling). Adhere to front of card. Then adhere the square piece as shown on card. Finally add ribbon and either make a hanging line with a silver gel pen or a piece of silver thread. |
|
Cut and score brown cardstock to make 5.5"w x 2.5"h top fold card. Cut silver to 2.5" square & brown to 2.25" square, and another silver piece to 4.75"w x 2.75"h, then cut a piece of clear plastic the exact same size. Cut slits in your brown card at .7" and 4.7" from the left side and the height of your silver/clear cardstock (2.75") and centered vertically (.3" border on top and bottom). Adhere copper border on top and bottom approx .1" from edge and .4" from right edge. Adhere clear plastic piece on either end with a very thin piece of double sided tape. (it will be hidden under slits of card). Push silver/clear piece through slits and adhere to inside back of card. Create and adhere ornament piece same as card but suing the small flourish. |
|
Return to More Glitter Gallery or to NittyGritty Gallery
|
Home |
Page
Index (text only) |
Glass Gallery |
"And
More" Gallery |