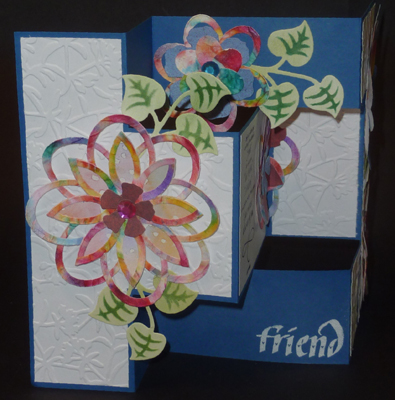
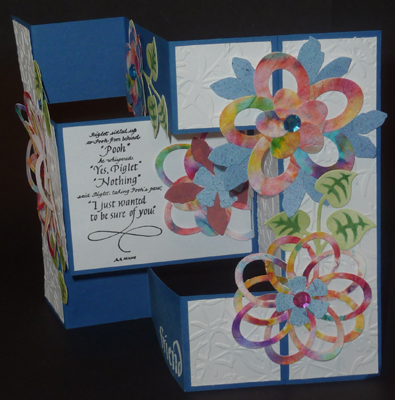
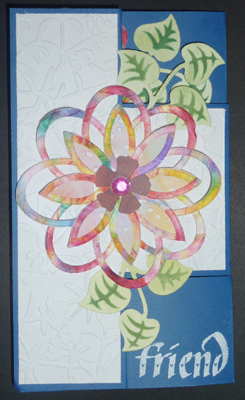
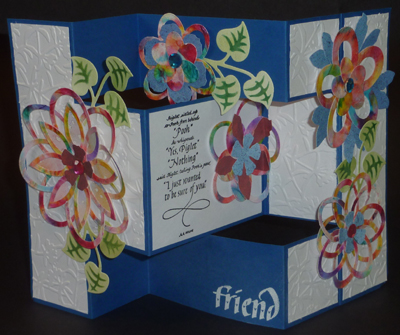
ID: DT  Project - Oval Flowers Pooh Card
Closed Size: 4"w x 7"h
 

Created: February 26, 2011
Modified: February 27, 2011

SUPPLIES: (Note: most of the supplies can be found online at QuietfireDesign.ca (items in Pink)
Cardstock Med Blue 7" x 12"
Cardstock thin white 65# (1 1/2 sheets 8.5" x 11")
Embossing Folder Cuttlebug "Floral Screen"
Die Cutting Machine of choice
Big Shot
Versafine Black Onyx
Brilliance Moonlight White
Embossing powder white, clear
Heat Gun
Distress Stamp pads "Peeled Paint" "Pine Needles"
Rubber Stamp "Friends" set, "Piglet"
Punch small 3/4" or 1" circle
Leaves (optional punch or dies) Marianne Design #LR0131
Ruler or paper trimmer
Scor-it board

X-Acto knife
Craft Sheet
Bone folder
various adhesives Sookwang Tape, White Glue, Glue stick


For Flowers:
Cardstock thin white 65# (1 sheet 8.5" x 11")
Spellbinders Nestabilities "Classic Ovals Large" "Classic Ovals Small"
Distress or Ecoline inks in floral colors
Mister
Scrapbook paper - coordinating pieces
Sharp scissors
Sizzix Tim's "Tattered Flowers",
Die Cutting Machine of choice
Big Shot
Glue stick, White Glue
Rhinestones coordinating colors medium size


INSTRUCTIONS:

Cut blue cardstock to 7"h x 12"w and score at 2", 4", 8" & 10".

Cut your 2 slits - my bottom one is at 2" h and my top one is 1.75" h, and cut between the first score line at the 2" mark and the last score line at the 10" mark.

NOTE: This card is totally adaptable to any size you want. Whatever length of cardstock you have, just divide the length by 6, (needless to say, math challenged people should stick with even numbers divisible by 6 like 6" 9" or 12" etc). You can use any height for your finished card, as long as there are 2 cut lines going from the 1st score to the last score lines. The big chunk I have in the middle could just as easily be at the bottom etc.).

M= mountain fold   V= valley fold

Folding the top row, the first fold is an "M" fold, then a "V" then a M"

The middle row is the opposite, first is a "V" fold (it's covered by the white cardstock now which hides the crease), then a "M fold, then another "V" fold.

The bottom row is the same as the first row.

PS: I decided not to crease the last score line on the top and bottom row, only on the middle row.

Now push the folds as they've been creased to close the card. Burnish the creases.

Run a full sheet of thin white cardstock using the Floral Screen embossing folder (will have to run through several times). Cut it down to size to fit each section you want covered leaving a thin blue border showing. Adhere with double sided tape.

Note: all flowers are made from the drop out pieces of the original die cuts, using the #1 dies of each set either nested together or just one to get a thicker outline. I created a full sheet of tissue background but only used 3/4 of it. I also pulled apart the petals from Tim's Tattered Flowers daisy floral as accent pieces.

Start adhering the oval flowers. Click HERE for oval flower tutorial. The main one on the front with a dab of white glue in the center. Leave the petals free of glue.

Adhere a smaller flower to the top inside, trying to hide it behind the front when card is closed, but making sure card still opens freely. Adhere 2 larger flowers on the last section. See card views above for placement.

Die cut some leaves (use any punched or medium sized die cut leaves) from thin white cardstock that's been sponged with some Peeled Paint, then sponge the details with Pine Needles. Adhere them to enhance the flowers (or hide an unwanted element).

Stamp the word "Friend", as per card sample, with the white stamp pad and emboss with the white embossing powder.

Stamp the quote with the black on a thin piece of white cardstock, emboss with clear embossing powder. Trim and adhere to middle portion of card as per card sample. Adhere the last flower, creasing it at the fold line.

Return to  NittyGritty  Gallery


Home Page Index
(text only)
Glass
Gallery
"And More"
Gallery