ID: DT July 2010 Wood Block Paper
Weight
6"long
Note: this is a standard piece of 2 x4 wood cut to 6"long
It was inspired from samples I saw at a class with Christine Ahmad
Created: June 25, 2010
Modified: June 27. 2012
|
SUPPLIES:
(Note: most of the supplies can be found online at
QuietfireDesign.ca
(items
in Pink)
white paper |
Dreamweaver white paste |
|
Decorative paper: Rubber stamp the "When you get to the end..." with the black pad on white paper, over stamping till paper is covered (approx 4 x 4" square). In a small leak proof container, mix the Tea Dye reinker with water. (5 pipettes of water to 7 drops of reinker). Don't be tempted to make more. This amount will do 1 or more full sheets of paper. Press your paper into the wetness, lift and move paper to another area of wetness until your paper is mostly covered. Rinse with some water, blot dry with paper towel and dry with heat gun. By pressing and lifting the paper, you get variations of concentration on your paper, making it more realistic. Set aside. Paint the front of the wood block with one coat of the gold, then 2 coats of the white pearl, then dry brush the burgundy into the almost dry white paint. Let dry. Tear your paper and put a layer of Matte medium on the back, then press onto wood block. Don't put any medium on top, it will interfere with any coloring or writing you want to do. |
|
|
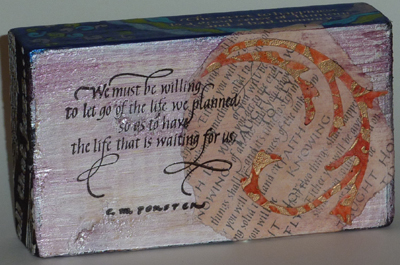
Die cut the flourish from some decorative paper you have lying around. (Mine was sponged with Distress, misted, run through Cuttlebug with Romance folder from Love is in the Air bundle then brayered high points with perfect Medium and embossed with gold). Rubber stamp the quote "We must be willing..." with the black and clear emboss. |
|
|
Paint with the Pearl Blue. Let dry. Rubber stamp the quote "The secret to Happiness..." with a pigment or black ink and emboss with the gold. Doodle squiggles and lines with the Sharpie. Color in some areas with the Prisma colors. |

|
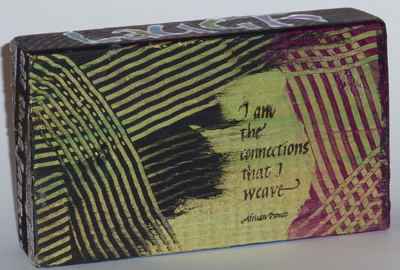
Paint a coat of Citrine, then dry brush with the Emerald. Let dry. Left side - paint with some black leaving uneven edges. Work quickly before your paint dries and comb your design with the texture tool, crossing over some of your patterns to create new patterns. Paint the right side with some Burgundy and repeat texturing. Leave a space for your quote. Let dry. Stamp quote "I am the connections..." with black and clear emboss. |
|
|
|
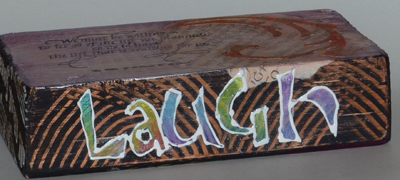
Paint with the Burnt Orange and let dry. Paint over with the black and create your pattern with your texture tool. Let dry. Draw the letters with a Sharpie and color in with the Prisma Colors. Outline the letters with the White Enamel Accents. Let dry. PS you can do this neatly or artistically splotchy... BIG GRIN |
|
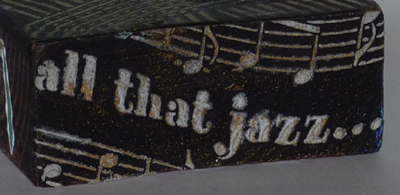
Paint with black paint or black Gesso. Let dry. Hold stencil firmly down and run your palette knife with the embossing paste over it. Skim off any excess. Carefully move finger to another solid area and finish pasting and skimming paste. Lift stencil off in a vertical direction. Let dry. Rub on some gold Metallic Rub Ons. |
|
|
|
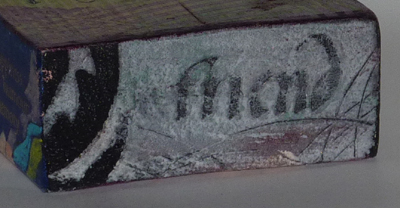
Paint with the black, let dry. Use part of the
negative piece from the Flourish die cut and skim across the end with the paste,
putting down a very, very thin layer. Press rubber stamp into wet paste without
squirming. Remove stamp and clean stamp immediately. Scratch some lines into wet
paste. Let paste dry then rub some greenish Metallic Rub Ons over some areas. As a final step you can give the whole block a coat of Matte Medium or other protective coating or just leave alone. I didn't put any 3D items on this piece so whichever side I wanted to look at that day, it would always stand up straight. And there's something for each mood I might be in... |
Return to NittyGritty Gallery
| Home |
Page
Index (text only) |
Glass Gallery |
"And
More" Gallery |