ID
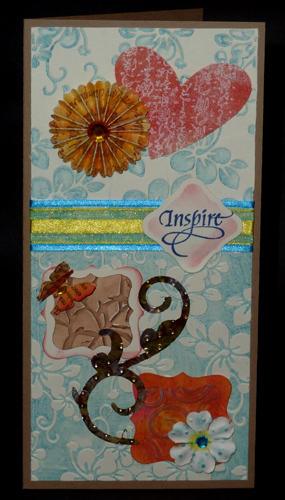
: OnLine Class - Punches Inspire4"w x 8.5"h
Created: September 14, 2011
Modified:
I'm also using a word stamp from Quietfire Design
|
|
ID : OnLine Class - Punches Inspire4"w x 8.5"h
Created: September 14, 2011
I'm also using a word stamp from Quietfire Design |
|
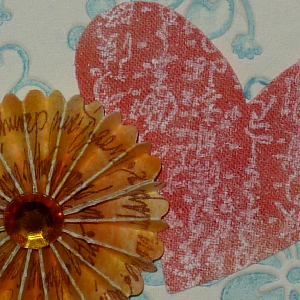
I used Kraft cardstock for the main card. Faux Letter Press: Ink up your folder (Crafts Too "Blossom) with a soft color of stamp pad (Distress Broken China) like dye or chalk inks. Run through machine. Take another piece of white cardstock and do the same with the other side of the folder. It gives a nice negative/positive variation of design. Resist on Fabric: (Done in day 1) Ink up stamp (Old Island Asian Text) with embossing ink (Perfect Medium) and stamp onto fabric (misc canvas), emboss with white embossing powder. This time I inked up my craft sheet with Mustard Seed & Worn Lipstick, misted with water and smeared my fabric through it then misted the fabric more till it blended well. Dried. Die cut withSizzix Tipsy Hearts. See sample Pic #1A Rosette: I stamped a piece of white cardstock (A stamp In The Hand "Word Pears") with Versafine Vintage Sepia, Sponged Mustard Seed And Dried marigold, die cut with Tim's Rosette die. Tip put a piece of Scotch Tape on the back to prevent the folds from breaking apart), accordion fold, adhere the ends. Punch a small circle, apply adhesive and form your rosette around circle and pushing down onto adhesive. Fill center hole with Glossy Accents and let dry. Add a rhinestone center. See sample Pic #1A |
Sample Pic #1A |
|
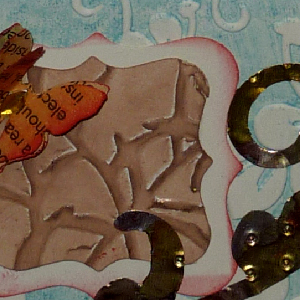
Sample Pic #1B |
This was supposed to be embossed on glossy but I used just regular white cardstock. Sponge into crevices and sponge or D2P on high points. Gives a soft look and then the accents of the high points. (Frayed Burlap) Sample pic 1B The butterfly was done with newsprint glued to another surface. I just stamped my text and colored it a newsprint color. Supposed to put pop dots under each set of wings to keep them uplifted. Didn't bother. Embossing on Metal: I used plumbers/electricians silver tape and ran it through my machine with the Swiss Dots folder. Colored it with alcohol inks and blending solution. The squares are punched out with 2 sizes of McGill Punches "Fancy Squares"
|
|
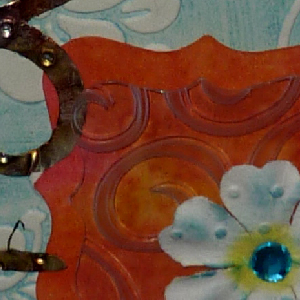
Embossing on Acetate or Clear Plastic: (see sample Pic #1C) Run through machine with embossing folder (D'Vine Swirls), should leave a white impression. For some reason mine didn't. I used Graffix Clear Craft Plastic and I tried plastic from a Spellbinders package, so instead I just sanded my high points. Will try again with something else. Sponged yellows and reds on the underlayer and pop dotted the acetate on top. Embossed embelies: Run a white paper flower through machine, then sponge high points with color. I added the rhinestone. assembled the card adding a wide blue gauze and a narrower yellow gauze ribbon. Stamped my word onto white cardstock with Versafine Majestic Blue, die cut with Spellbinders Labels #1, sponged Worn Lipstick around edges. |
Sample Pic #1C |
|
|
Please use your back button for previous images or should you wish to go to the Hand Painted More Cards Gallery or More Cards 2 Gallery please click on one of the links below. More_Cards Gallery or More_Cards2 Gallery or click the Home button to go to the More Cards 2011 Gallery
|
| Home |
Page
Index (text only) |
Glass Gallery |
"And
More" Gallery |