ID: MC July 17 - Easel Stamped Die Cut - ECD Beautiful You - I Don't Tell - HB card
size: 7"w x 5"h (standing)

Created: July 14, 2017
Modified:

A Crafting friend pointed me to one of Jennifer McGuire's recent uTube videos - Stamping on die cuts, so I decided to try it right away.

I'm using a couple of an A Way With Words die "Amazing Beautiful" and "Wishing You a" from Elizabeth Craft Designs, also available on Quietfire Design HERE and HERE

And I'm a sentiment stamp set from Quietfire Design

("I Don't Tell You Often Enough" 5pce set);


Scored and folded my pink toned cardstock to create the easel. Cut another piece same size as front and adhered.

Created my stamped background and the stamped die cut layer (see pics and instructions below).

Trimmed down my background to 7"w x 5"h, then punched around the sides using an EK Success "English Ivy" border punch. I positioned the punch in the center of a side and worked the punch to either side. Repeated on the opposite side. Then continued on the other 2 sides, stopping before it hit the edge. Manually trimmed down the corners.

Adhered to front.


On the floor: Embossed a piece of white cardstock using the Cuttlebug "Happy Birthday" embossing folder. Hit the high points direct to paper with "Spun Sugar". Trimmed down to size.

Stamped the sentiments on another piece of white cardstock using Versafine Black Onyx and clear embossed. Die cut it and the pink layer using Elizabeth Craft Designs "Stitched Rectangle" set. Adhered both layers together.

Adhered a piece of narrow blue satin ribbon to the Birthday embossed piece, then adhered the sentiment assembly. Adhered all this to the floor with 3D foam tape to act as my stopper.

Tied a bow and adhered with  hot glue.

Adhered some heart/pearl rhinestone to the ribbon.


Using my Misti (so that I could register my images for the die cutting and assembly) and the Penny Black "Magnolia Rhapsody" stamp. Inked the stamp using Distress mini pads - "Picked Raspberry" all over the flowers and buds,  "Wilted Violet" flicked on the base of the flowers and buds, then hit here and there on the flowers and buds with "Fossilized Amber".

All over the leaves and branches with "Mowed Lawn", here and there on the leaves with "Forest Moss" and here and there on the branches with "Ground Espresso". Misted with water and stamped onto white cardstock.

Repeated the process to stamp on another piece of white cardstock.

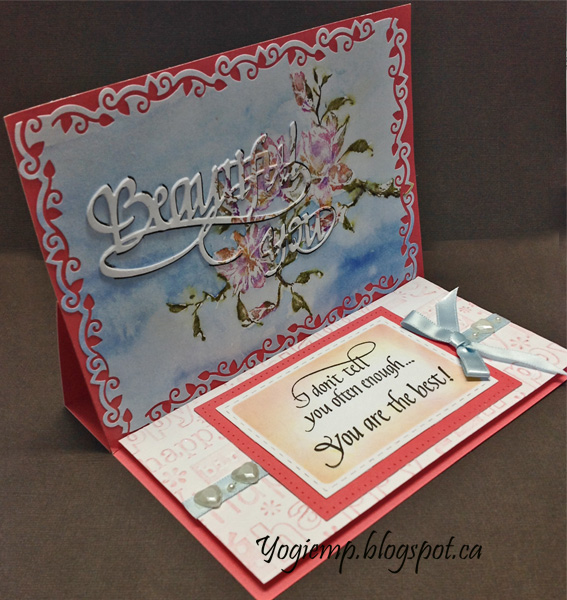
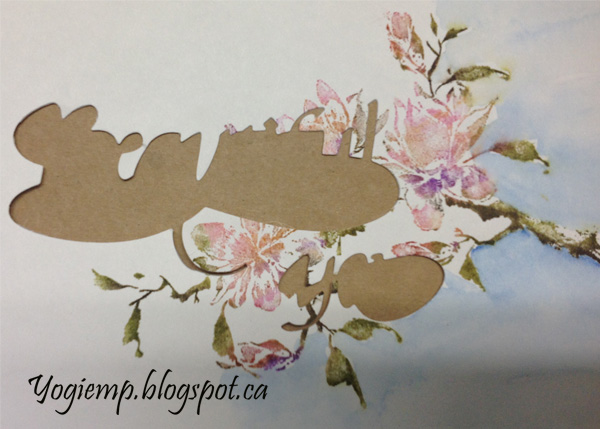
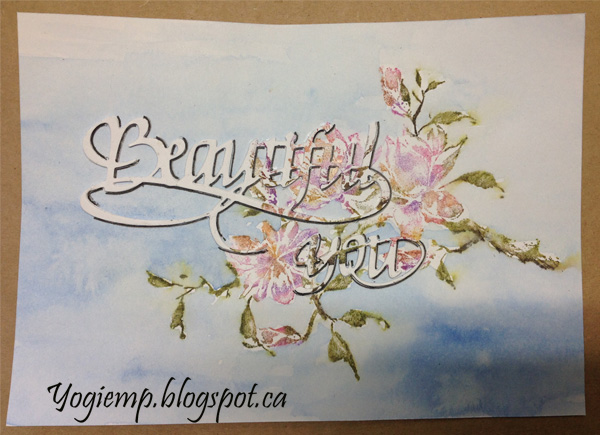
Placed the 2 dies on a desirable area of the stamping and die cut. (that's the above image)

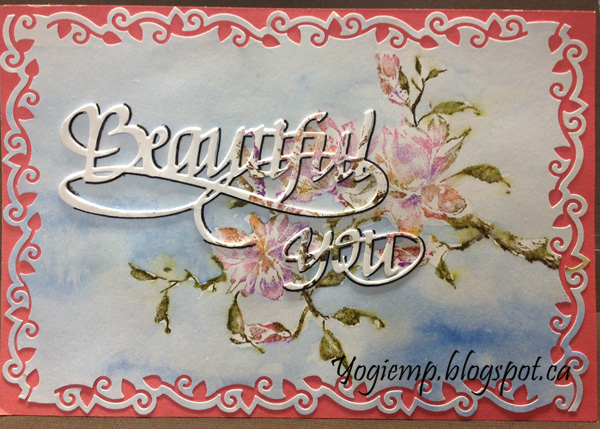
You'll notice that some of that image has the background colored... I experimented on it to pick my blue watercolor for the background.

I filled a waterbrush with water and some of that blue color. Squeezed some out while painting around my stamped image. I also picked up some of the blue paint to add intensity is some areas, blending and moving the color around. I purposely touched part of the stamped image which became activated with the wetness giving a diffused edge. Allowed my background to dry.

Used the negative die cut piece aligned with my painted background piece to position my die cut words to fall exactly on the stamped image. I also die cut 2 more layers from white cardstock to add height to my words. Glued them down.

I found the word a little washed out with all the whiteness so used a pencil then a black line with a Zig writer to give a shadow outline on the right and bottom of each letter.

 Please use your back button for previous pages or should you wish to go to the Misc Challenges 2017 Gallery please click on

or to go to the Misc Challenges Card Gallery 2016 click HERE

or to go to the previous Misc Challenges Card Gallery click HERE

or  And More Gallery for other hand made greeting cards please click the link below.

More Cards Gallery

Home Page Index
(text only)
Glass
Gallery
"And More"
Gallery