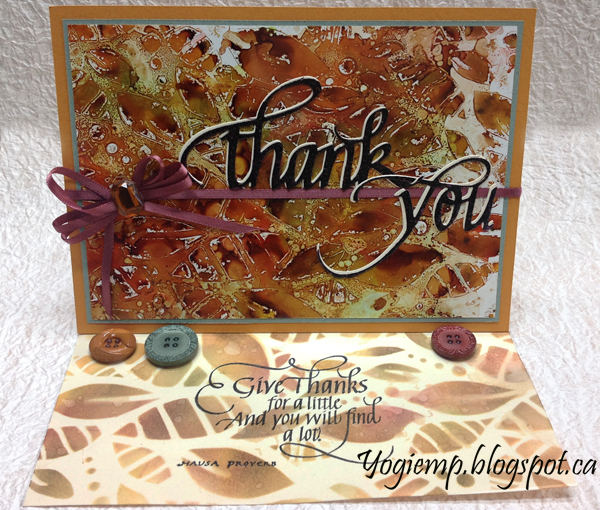
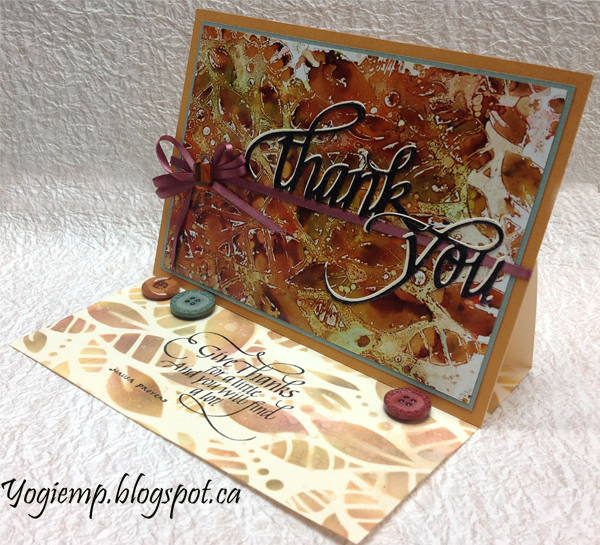
ID:  MC Nov/16 - Stencil Leaves Easel - ECD Thank You - Give Thanks card
size: 7"w x 5"h (easel closed)

Created: November 20, 2016
Modified:

My turn on the Quietfire Creations blog and I thought I'd play with a stencil and alcohol inks... 

I'm using an A Way With Words dies from Elizabeth Craft Designs "Thank You", also available on Quietfire Design HERE

I'm using a quote stamp  from  Quietfire Design  

("Give Thanks" 2pce se);


Scored, and folded my cream toned cardstock to create the easel. Cut a pumpkin colored cardstock same size as card and adhered to front.
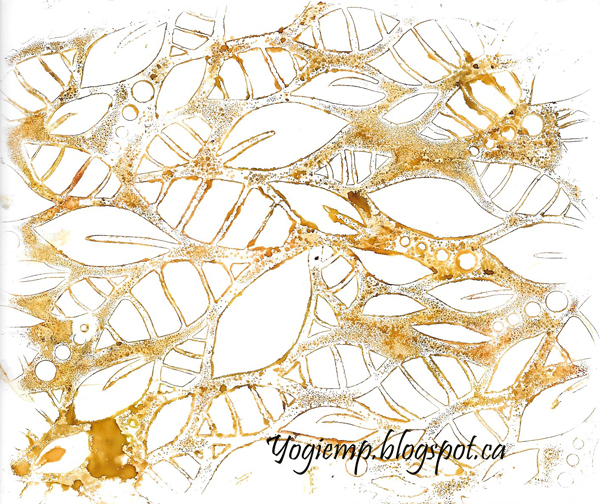
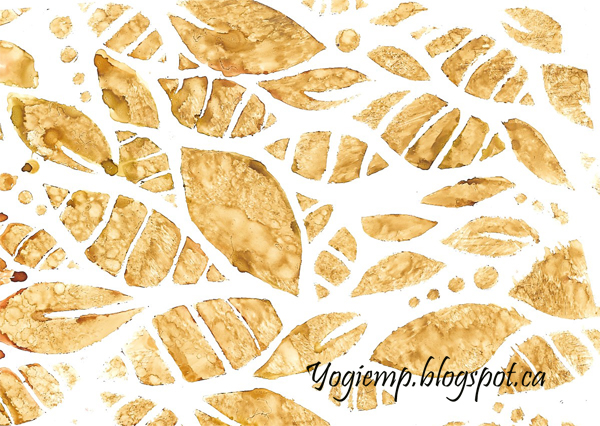
Created my alcohol stenciled background using glossy paper I mentioned getting a while back. Taped it to my work surface, then taped the stencil (Pronto "Leaves) down. Dropped various colors of alcohol inks (all the yellows and oranges, some Limeade, Pesto and Espresso). There was a lot of wetness and of course it seeped under the stencil - sigh!!, so I removed the stencil and set it aside to
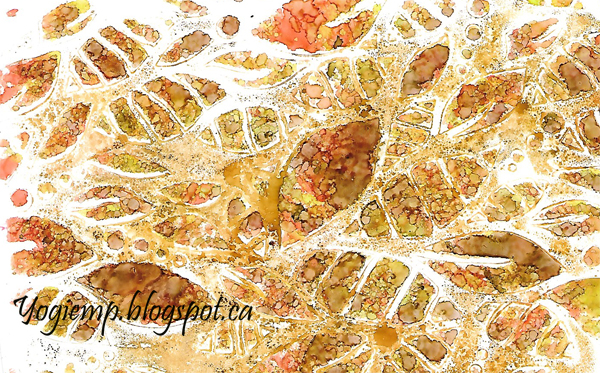
 dry.

Now the stencil had a ton of dried ink on it, so not to waste it I continued playing. See below for the various results.

After playing with the other variations, I came back to the original one. I taped the glossy paper down, matched up the stencil, and adhered one end firmly. Applied lots of blending solution to my felt and pounced on part of my stencil, then immediately pressed it down on my glossy paper giving the bubbly effect between the solid leaves. Continued applying the blending solution on different areas and pressing down on the paper till the whole negative areas were bubbled... 


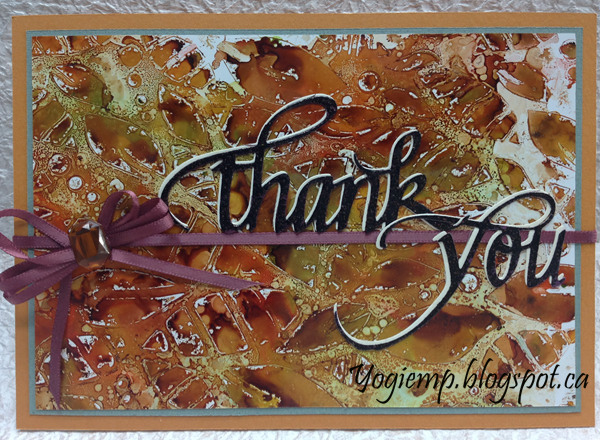
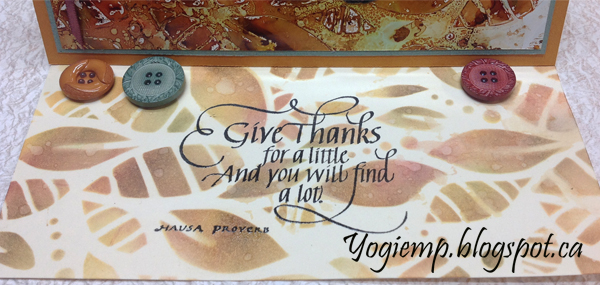
Trimmed it down, adhered to a sage green cardstock, then onto my card front. Adhered a burgundy narrow ribbon and bow, adding an amethyst cabochon to the bow center.

Die cut the "Thank You" from a cream toned cardstock and a dark colored cardstock. Applied Versamark to the dark one and embossed with Emerald Creek "Oil Rubbed Bronze" embossing powder, then adhered both layers together slightly off set, then on to the card front.

On the Floor: Used the same stencil and Distress ink, sponged various colors of yellows, oranges, greens and brown. Dried thoroughly.

Stamped the quote using Versafine Black Onyx and clear embossed.

Adhered the 3 buttons to act as my stopper using a glue gun.

I applied a generous amount of blending solution to my felt, then swiped it over the glossy paper all over leaving a nice wetness on the paper. IMMEDIATELY flipped it over on to my dirty stencil and pressed down, burnishing the wetness into the stencil to release the dried ink.

I started this one the same as above, then pounced with the wet felt, which released the dried up ink from the stencil.

Note: my stencil had ink on both sides, so the 1st step was on one side of the stencil and the 2nd step was the other side of the stencil.

For this one I just used a clean wet felt and and in a cleaning/sweeping kind of motion moved the dried ink off the stencil and onto my glossy paper.

 Please use your back button for previous pages or should you wish to go to the Misc Challenges 2016 Gallery please click on

or to go to the Misc Challenges Card Gallery 2015 click HERE

or to go to the previous Misc Challenges Card Gallery click HERE

or  And More Gallery for other hand made greeting cards please click the link below.

More Cards Gallery

t
Home Page Index
(text only)
Glass
Gallery
"And More"
Gallery