ID: MC Jan/15 - 
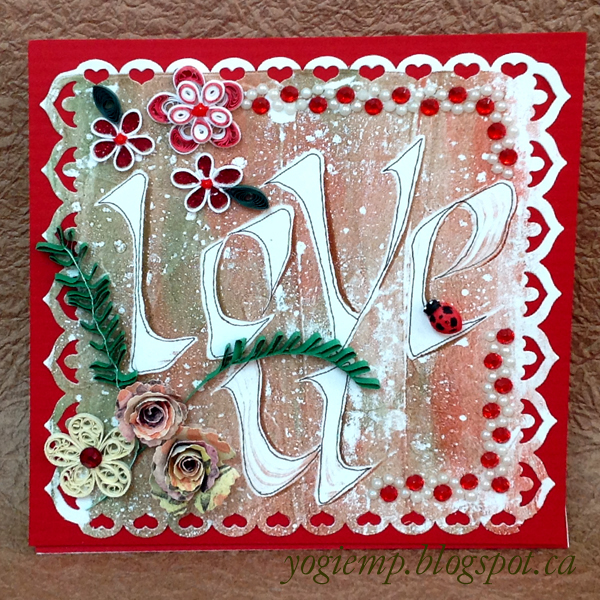
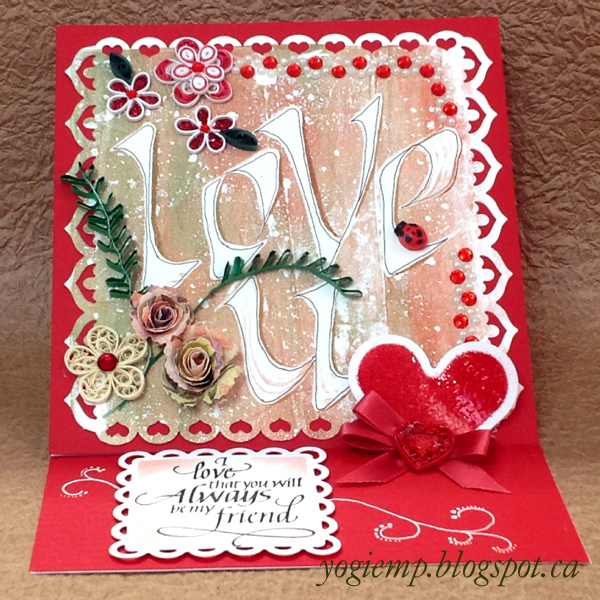
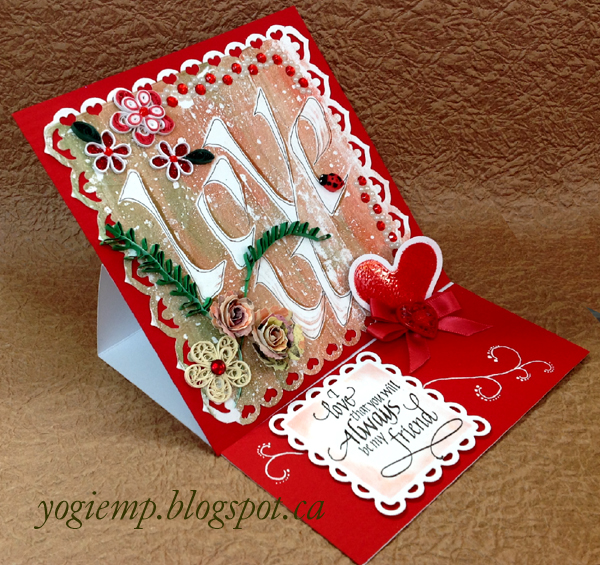
Quill Easel Gelli Print Love U - Always Be My Friend card
size: 6"w x 6"h (card closed)

Created: January 12, 2015
Modified:

I had an epiphany... and started experimenting... doing calligraphy on a pulled gelli print... and it worked. When doing calligraphy on a gelli plate, the lettering has to be in reverse which is very difficult if you are doing broad edge pen calligraphic lettering. So what I did was did my calligraphy, then did my 1st print onto another gelli plate, then pulled a print. It gave a similar effect of a 2nd generation print. Different papers worked better than others. Misting the plate did not work, but misting the paper very lightly helped. Glossy cardstock worked really well (need to try glossy paper...), which is what this card was made from. HP w/c paper - some worked nicely some didn't. Matte type paper was my least favorite although it gave some interesting pulls depending on the moistness. More experimenting to try...

I'm using a relatively recent quote stamp, from Quietfire Design

("Always Be My Friend" 3pce set);


I dropped Golden's Fluid Acrylics on to my Gelli plate (bunch of drops of Iridescent Gold - fine , 2 drops of Jenkins Green & 2 drops of Quinicridone Burnt Orange), brayered just to disperse the colors and blend a little bit. Used a tiny glue spreader as my broad edge pen and did the lettering in my Funky Bone style. Placed my 2nd Gelli plate over the first Gelli plate, pressing down to get all areas transferred. Pulled the Gelli plates apart and immediately pressed my glossy cardstock (Sterling Premium Digital, Gloss, Cover, 100#) over the 2nd Gelli plate, burnished well, then removing the cardstock. Did an inner outline of the lettering using a micron pen.

Die cut the borders using my hard rubber mallet - left and right border using Spellbinder's "Floral Doily Accents" set. top & bottom borders using On The Edge set. Adhered it to a red textured cardstock. Then on to the front of my easel.

Adhered my quilled elements (all from my stash...). Adding rhinestone centers or red glitter (Glitter Ritz micro fine glitter Regal Red) in the petals of the upper white flowers and some dots of Viva red pearl pen. Did make the quilled ladybug.

Added the red/white rhinestone borders.

sorry the pic isn't that good...  doesn't have enough gold saturation

Cut a piece of the red cardstock for the floor. Stamped the quote onto white cardstock and die cut with Spellbinders "Lacy Squares", sponging with a dirty red sponge around the edges. adhered to floor with 3D foam tape. Drew in some flourishes using a white gel pen.

Die cut the heart (Spellbinders Classic Hearts" set) from white cardstock, sponged with Distress "Festive Berry" and embossed with red embossing powder. Then re-inked and embossed a 2nd time with clear embossing powder. Adhered to floor.

Assembled some pieces of red satin ribbon, using a glue gun, to make a double loop bow. Adhered to heart, then adhered the red heart button (first cutting off the shank).

 Please use your back button for previous pages or should you wish to go to the Misc Challenges 2015 Gallery please click on

or to go to the previous Misc Challenges Card Gallery click HERE

or  And More Gallery for hand made greeting cards please click the link below.

More Cards Gallery

 
Home Page Index
(text only)
Glass
Gallery
"And More"
Gallery