|
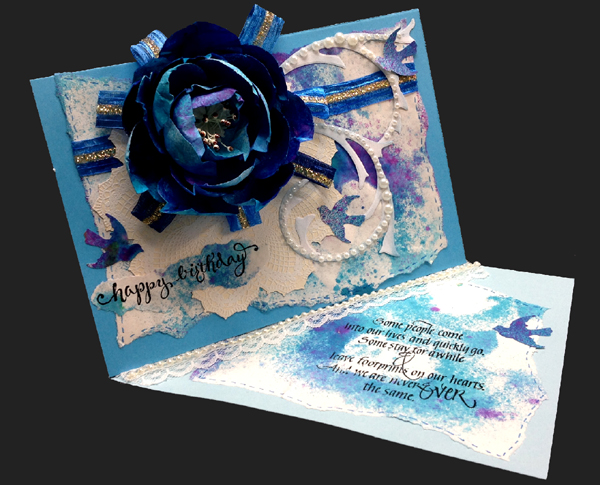
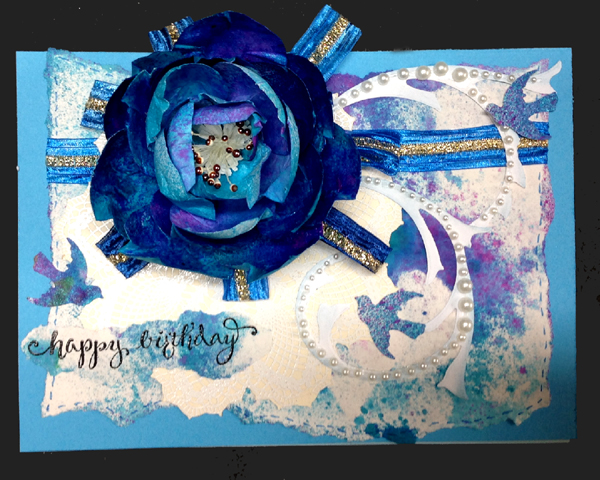
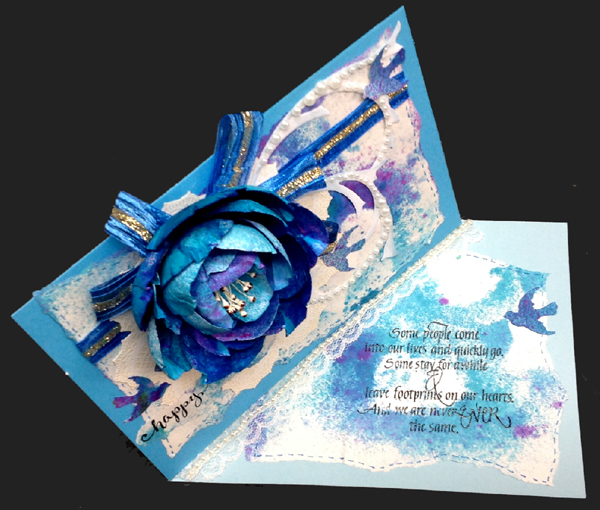
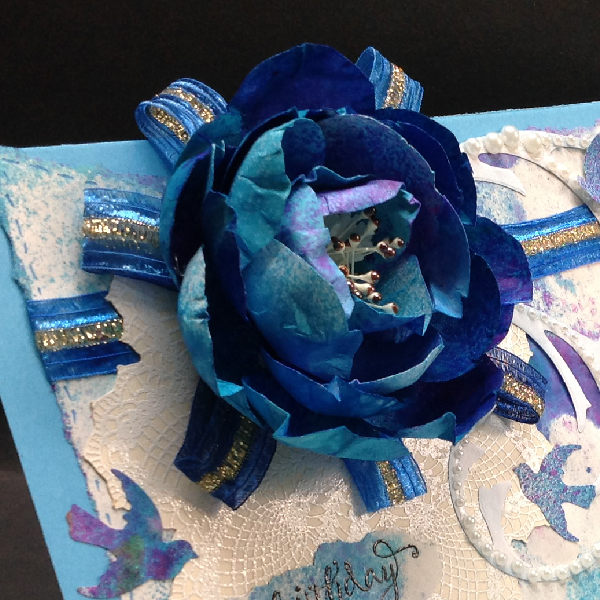
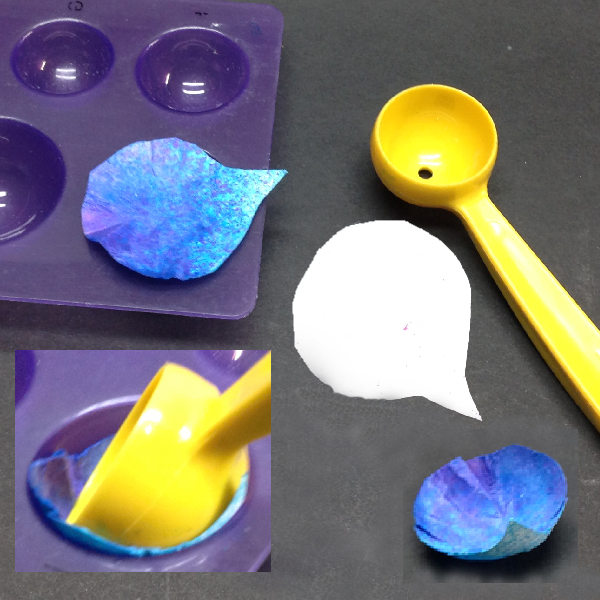
I created my flowers from white 67#
cardstock, cutting out the petals free hand with scissors. PS: I
always have a calligraphy practice pad under me made from Genoa bond
type paper. I sprayed my petals on both sides using Dylusions
"Calypso Teal", then gave a light spritz of "Bubblegum Pink"
on one side, then a mist of Perfect Pearls "Turquoise". Used the
tools below to shape my petals. Adhered the two outer layers of
petals to a 1" cardstock circle using my glue gun - and ran out of
petals BIG GRIN... so cut a bunch more, but this time sprayed them
with a watered down version of the Teal (70%H2ş). Continued adhering
them to the circle. Also adhered several for the center cluster
head. Adhered a quilled fringed white piece, then adhered a bunch of
stamens that were white with a brown dot on them.
Now the reason I
mentioned my calligraphy pad was because I tore off the paper after
spraying the petals and the inks seeped through the backside leaving
a beautiful background which I tore off and adhered to a piece of
aqua blue cardstock. Wrapped a piece of blue Sari ribbon around,
then adhered my doily lace which I cut with my electronic cutter
from cream toned cardstock, stamped with Stampin Up "Hello Doily"
using Versafine "Toffee" and embossing with white embossing powder
(so it's hard to see the doily - sorry.
I then adhered loops of
the Sarin ribbon with my glue gun and then adhered the flower.
I scored my light blue cardstock to make
my side easel card, then adhered my flower layer.
Stamped the "Happy
Birthday with Versafine Black Onyx on another piece of the
background paper and clear embossed, then tore and adhered to card
front.
Die cut Sizzix Tim's
Flourish from white cardstock, sponging with a dirty blue sponge
along the edges only, and cut it apart into two pieces, adhering
white half pearls all over the flourish, then adhering it to the
card.
Added faux stitching with
a Distress marker "Salty Ocean". |