|
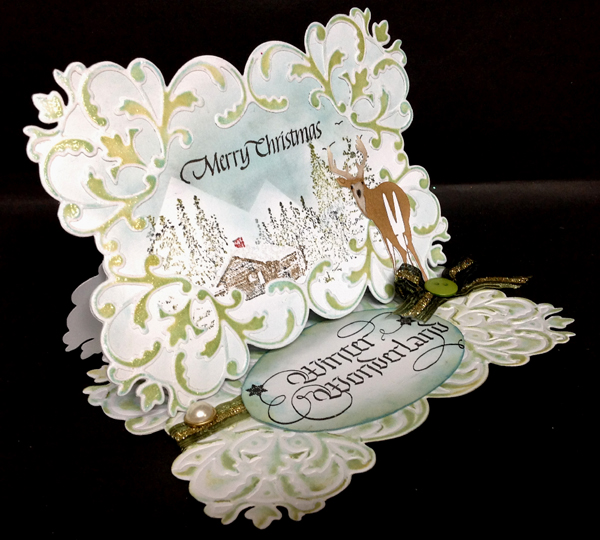
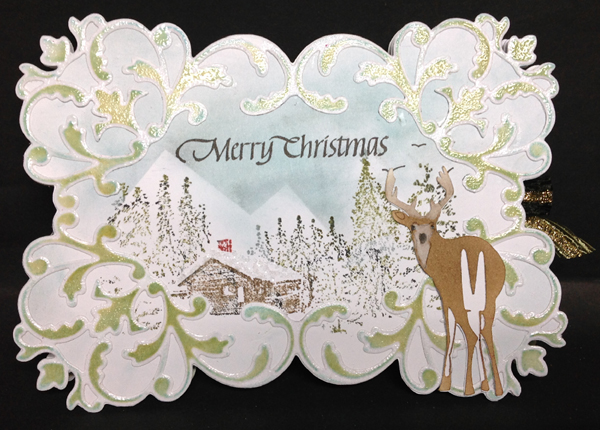
I cut and embossed the Cuttlebug
Flourish Emblem from white cardstock. Sponged Distress "Shabby
Shutters" through the die, then removed it from the die and hit the
high points direct to paper with "Tumbled Glass". Cut out
the looped center portion then applied Versamark
all over and clear embossed.
Used the negative to
create a cut file for the outside contour. Imported in to my Sure
Cuts a Lot software and copied and pasted a 2nd one, welding the
design at the mid point, then cut, scored
and folded my white card to create the easel. Used the die and the
tan mat to emboss the floor, sponging with the same colors. also cut
a single blackout design to place in back of the die cut.
Stamped the winter scene on to the
eCut blackout design (Impression Obsession J7763) using Distress
mini pads, coloring the various parts, misting with water and then
stamping. Used post it notes to create the mountain areas, sponged
various blues into the sky area. Adhered the die cut piece. added
some birds with a black marker. Used a Quickie glue pen on the roof
and added some glitter (Stampendous "Crystal Snow") Stamped the sentiment with Versafine
Black Onyx. Adhered it all to the front of the easel card. |
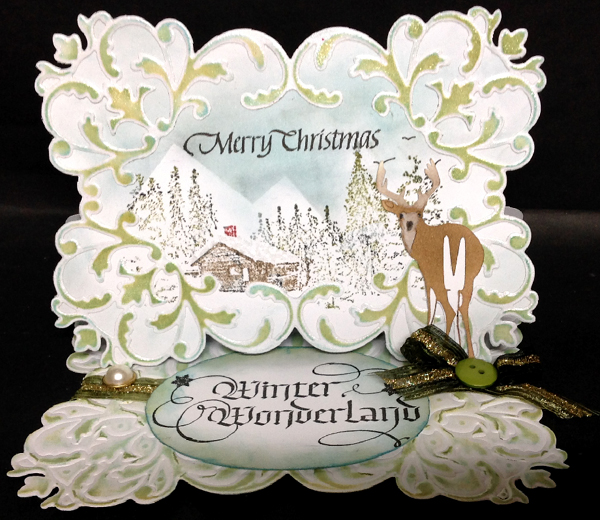
eCut the
deer and eCut an under layer, sponged various browns on to the top
layer, colored the antlers and chest area with a white Prisma
colored pencil, glued both sections of the deer together and on to
the card front. |