ID: DT Dec/12 - Xmas Ornaments
 

Created: December 13, 2012
Modified:

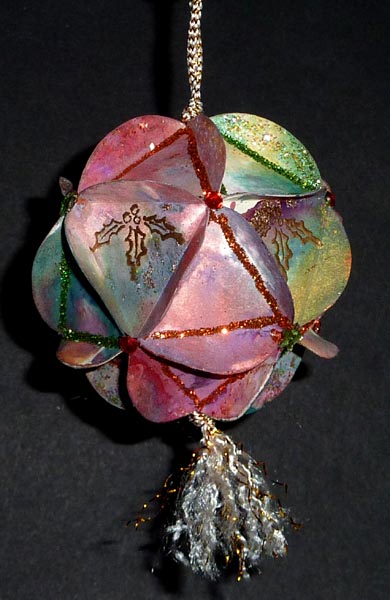
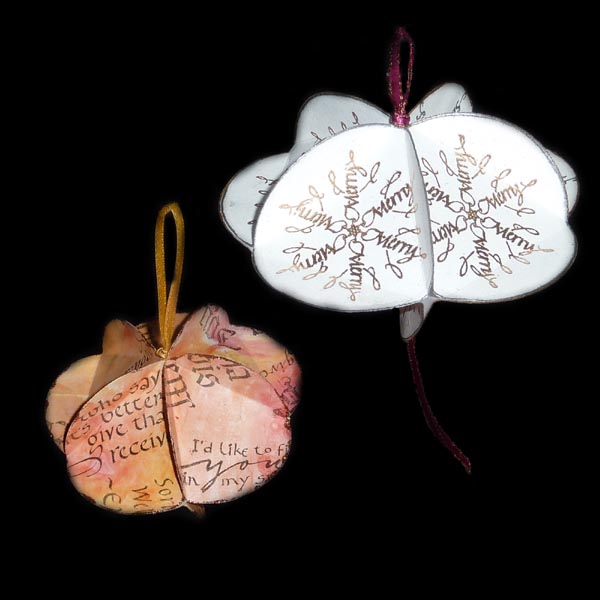
The ornaments on the left are created from 10 die cut or punched circles... a very easy project. The one at the bottom is done with 20 circles and a bit more involved.

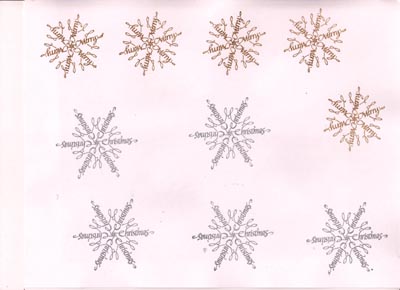
The ornament on the far left had the abstract background made first on some glossy paper using various Xmas stamp sentiments and quotes, just filling up the background, spraying with Dylusions sprays and some water and drying, then die cut with a Spellbinders circle die.

The ornament on the right had the snowflake words stamped and embossed in gold or silver on white 67# cardstock, with plenty of space between the stamping to then die cut with the circle die - see image below - Dia "A".

All the stamps used are from Quietfire Design.

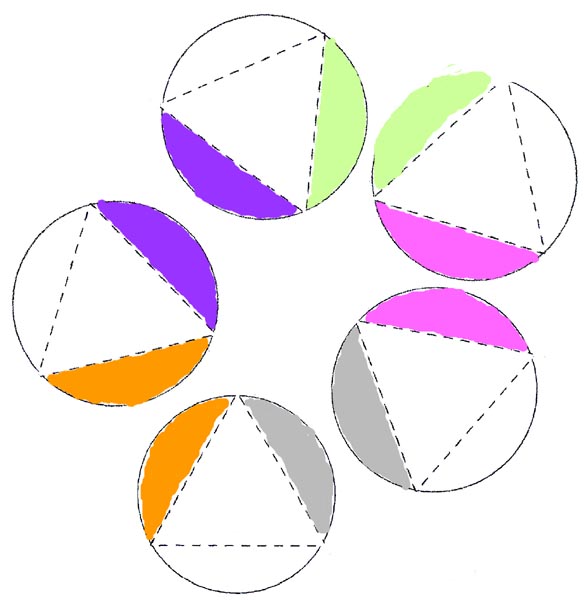
Scoring template HERE

Dia "A"

After die cutting, each circle was scored using a clear plastic stencil (see scoring template link above) and then folded on the score line. When all were scored, the flaps were adhered to each other.

Do 5 circles to create the top first. Then the next 5 to do the bottom section, then adhere the two sections together.

Apply some glue (glue stick or some white glue) on ONE flap only (on the undecorated side). Adhere to a flap on the next circle. On this circle apply glue to  a flap and adhere to the third circle. Continue to fifth circle, then adhere the fifth circle flap to the first circle flap. See Dia "B"

Repeat for the bottom section.

At this point you can attach a string or ribbon and adhere to the inside of the top part of your ornament. Or you can wait to finish the ornament and punch a hole in one of the flaps and tie your ribbon.

Adhere the two sections together, by gluing one flap from the top to the bottom, then the next one and so on till all have been glued together.


Dia "B"


For the more involved ornament you will need 20 circles, Follow instructions as above for 10 of those circles. With the other 10 you will adhere in this configuration below

Then adhere the top and bottom sections to the center piece, one flap at a time.

Circles were die cut first. On a craft sheet apply splotches of Distress colors - Picket Fence, Worn Lipstick, Evergreen Bough, Scattered Straw. Smoosh your circles through the splotches and dry. Stamp the flourished holly with Versafine Toffee and emboss with Queen's Gold.

Finishing touches, add glitter to the outside edges of each circle, or along the creases of the circles. Adhere rhinestones or pearls to the junctions of the circles using some Golden's gel medium.


Return to Crafts Gallery or to Glitter Gallery or  to  NittyGritty  Gallery


Home Page Index
(text only)
Glass
Gallery
"And More"
Gallery