MingleStanding


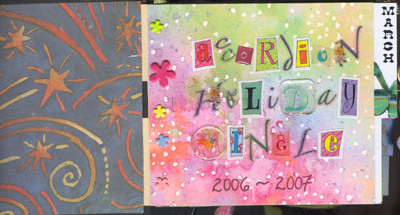
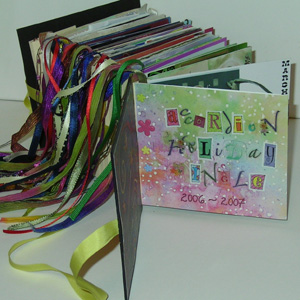
ID: Accordion Holiday Mingle Bound

5"w x 4.5"h x 4.5" thick
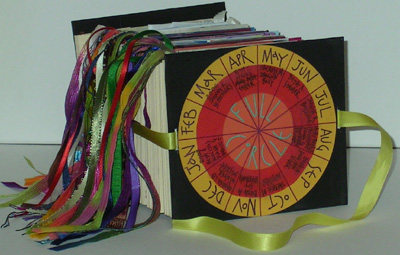

I used 
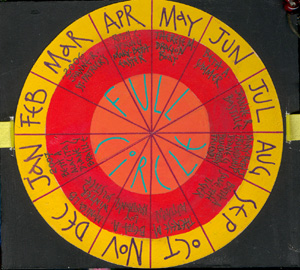
mat board for the covers, painted them with black gesso. I used a plain piece of cardstock and drew in my circles, then painted them with Chroma color acrylics (yellow, red & and inner circle -  mix of red and yellow). Split the circle into 12 segments using a pink Sakura Stardust gel pen and wrote in my months with mauve. Wrote the word "Full Circle" with a green Souffle gel pen. I was trying to come up with an appropriate title for my mingle book and "Full Circle" popped into my head. I thought it fit. Added my text of the people I sent a mingle to and the theme used with a black micron pen. Made 2 slots in the cover to thread my yellow ribbon for holding the accordion closed. (detail pic at bottom of page)

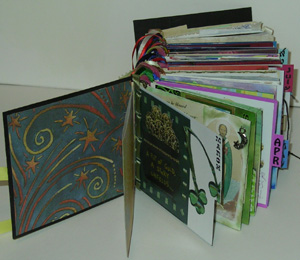
Note the back cover is not attached yet or the ribbon cut, since there are still several pages that will be added until this 12 month mingle ends.
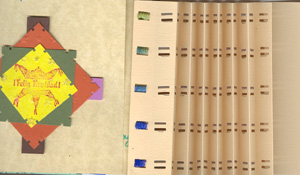
 

MingleStandingOpen

Inside Title Page

MingleStandingSpine

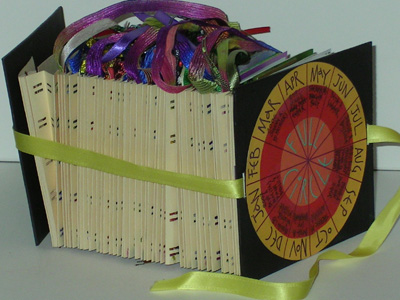
With ribbons out of the way you can see what the spine looks like. The spine on this accordion stays nicely closed. My accordions were all 1/2" wide and made from beige toned Fabriano Tiziano cardstock. The first couple of pages were a little tricky to put in, but once there was some weight on the accordions the rest went pretty easily. I've done one splice so far and maybe will have to do a second splice. What you see here is 50" of folded cardstock


MingleTitle

close up of inside cover and title page (you can see one of my tabs - March)

I used scrapbook paper to cover the inside cover and to make my title page.

The yellow ribbon is hidden under the cover paper. I did not glue that area down, so the ribbon moves freely.

The title page was attached to the accordion with various colored flower brads and I wrote the title using various alphabet stickers. 

MingleStandingTabs

You can see the tabs with the months written on them

 MingleTabs

Close up detail of the ribbons for attaching to accordion folds - the back of one page and the front of the next (left side of pic) and tabs for Sept, Oct & Nov visible (right side of pic)


I always scan or photograph my work, so when I was putting all my mingle pages together I thought it would be nice to have a remembrance of the pages I made. So I went back among my files, put the images @ 100% on a 6"w x 4"h photo format which left white space on both the left side and right side of the photo. I copied and pasted some of the plain color used for that mingle to fill in the white spaces so everything would blend and merge, then added my text of the months in the appropriate spot. I also made a photo of the back of my mingle. Had the prints made and then cut out the section I needed, matching the back section to the front and then glued them together. Since this was double thickness photo cardstock, it has good weight for the tabs of the month.

I used various colors and width of ribbons to attach my pages depending on the color scheme of that mingle page. I also put a dab of glue on a small tip of the ribbon and glued it to the inside portion of the accordion fold. I made a template putting an arrow for where the top should be and which side is the right side, so all my holes would be in the right places. I used a ribbon punch to make my holes.


MingleCover

Close up of cover (you can see the ribbon going in and coming out on either side of the circle)

 MingleFolds

Back of the last mingle page and the accordion fodls waiting for their pages.

 Please use your computer's back button for previous images Thank You

or the Home button below to go to the Holiday Mingle Gallery


or should you wish to view the ByHand Gallery  please click on the link below.

ByHandGallery


Home Page Index
(text only)
top of the
Page
Glass
Gallery
"And More"
Gallery